How to Create HTML5 Ads with the Adobe Animate FlaExporter Extension
In this tutorial you will learn how to use FlaExporter to simplify the process of creating HTML5 ads with Adobe Flash or Adobe Animate.
Overview
For many years Adobe Flash was the standard way to create DoubleClick ads. Now that DoubleClick and Adwords only accept HTML5 ads, creative studios are forced to either learn to hand-code JavaScript or deal with the slow performance of visual authoring solutions. FlaExporter is a new way to publish high-performance HTML5 content directly from Adobe Flash or Animate without having to restructure your .fla files.
In this tutorial you will learn how to use FlaExporter to simplify the process of creating an HTML5 ad with Adobe Flash or Adobe Animate.
The following topics are covered--
- Working with clickTags (DoubleClick)
- Retina/High DPI asset setup
- Handle multiple exits on buttons with onClick
- Handle rollovers with onMouseOver/Out
- Call JavaScript on the page from timeline code in the FLA
- Show an ad preloaded
- Automatically optimizing your assets with one click
- Test and validate the ad
Download HTML5 Ad Integration Template
First click here to download the FlaExporter HTML5 Ad Template FLA.
You should be able to use this FLA and the included HTML file as a starting point for creating your own ad.
If you haven’t already download FlaExporter. It’s free!
Handling Click Events and Exits
To handle a click event exit add the following inside an onClick handler inside your MovieClip.
window.open(window.clickTag)
The onClick handler will handle mouse and touch events for both desktop and mobile devices.
Multiple exits and click events are supported.
Note that in this example JavaScript on the page is being called directly from the FLA timeline. There is no need to use bridge code like ExternalInterface.
Here’s a working example in the template FLA file --
onClick(function () {
trace("CTA clicked ");
window.open(window.clickTag);
gotoAndStop("collapsed");
});
Handling Mouse Events and RollOvers
Flash Button symbols states(Up, Over, Down) are supported without needing any changes.
Animated multi-frame rollovers can be created easily by adding onMouseOver/ onMouseOut event handlers inside your MovieClip.
Here’s a working example in the template FLA file --
onMouseOver(function () {
trace("CTA onMouseOver");
gotoAndPlay("expand");
});
onMouseOut(function () {
trace("CTA onMouseOut");
gotoAndPlay("collapse");
});
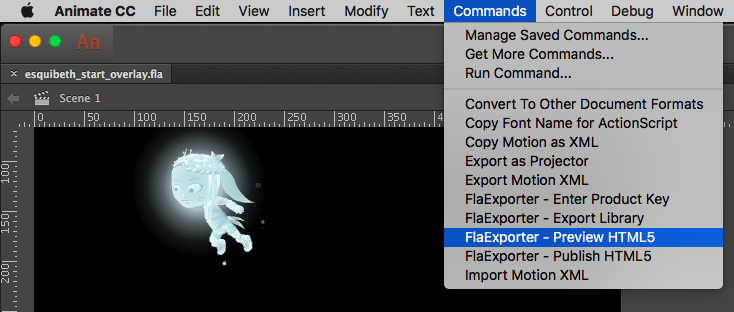
Preview HTML5 allows you to test in your browser
Once your project .fla is ready to test and preview, you can use "Preview HTML5" to see your project as your audience will see it in the browser. Simply select "Preview HTML5" from the "Commands" menu. The extension will convert your .fla file to HTML5 and open it in a new browser window using your default browser. You can assign a keyboard shortcut to make exporting easier. When the preview window opens you can play any animation timeline or library symbol by selecting it by name from the Movies drop-down menu.
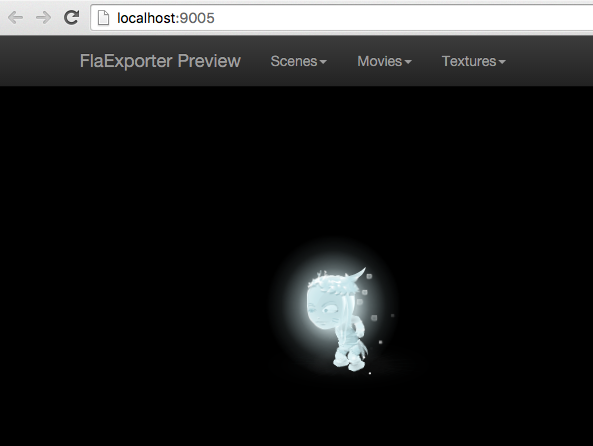
Preview Window
When the preview window opens you will see 3 drop-down menus--Scenes, Movies, and Textures.
- The Scenes Menu allows you to play the animation timeline of an entire Scene.
- The Movies Menu allows you to play any animation timeline or library symbol.
- The Textures Menu allows you to view the generated images that will be used.
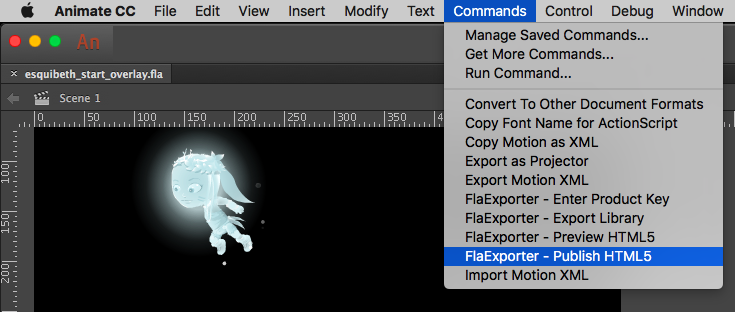
Publish HTML5 generates the files needed for web publishing
Once your project .fla is ready for publishing, you can use "Publish HTML5" to generate the files to deploy to the web. Simply select "Publish HTML5" from the "Commands" menu. The extension will convert your .fla file to HTML5 and write the files to the folder you select. These files are intended to be deployed to a web server. If you want to run your project locally you should use the "Preview HTML5" command instead. You can assign a keyboard shortcut to make publishing easier.
?
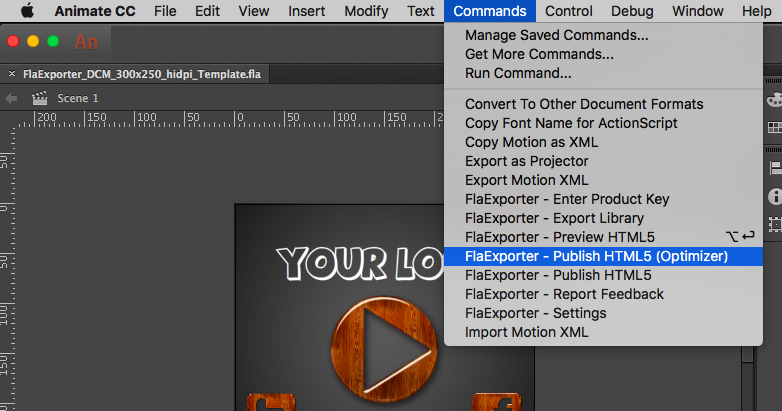
Automatically optimize assets to shrink file sizes 60-80%
Once your project .fla is ready to test and preview, you can use "Publish HTML5 (Optimizer)" to generate optimized files to deploy to the web. Simply select "Publish HTML5 (Optimizer)" from the "Commands" menu. The extension will convert your .fla file to HTML5 and write the files to the folder you select. These files are intended to be deployed to a web server. You can assign a keyboard shortcut to make optimizing easier.
Customizing Settings
Setting the clickTag variable
Open the including HTML file and change the value of the clickTag variable to the desired URL.
<script type="text/javascript">
var clickTag = "http://www.google.com"; </script>
</head>
Modifying the size of the ad
Open the including HTML file and change the width and height of the ad.size meta tag to your desired dimensions.
<meta name=”ad.size” content=”width=300,height=250”>
Using a customized preloader animation
Open the including HTML file and you will see a section of the document that begins with #spinner. Change this to use your desired preloader animation.
?
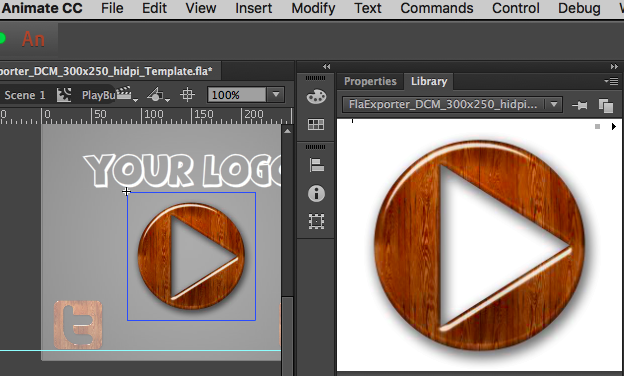
High DPI and Retina Assets
To create content that looks crisp on high DPI and retina devices simply use library symbols that created at 2x their size when used on the timeline. Then scale the symbol to 50% when the symbol instance is added to the timeline.
All of the assets in the template are created this way.
For example the dimensions of the background on the main timeline are 300x250 while the image inside is 600x500.
What's Next?
After you publish your ad using FlaExporter - Publish HTML5 or FlaExporter - Publish HTML5 (Optimizer), zip up the published folder and upload the zip here.
https://h5validator.appspot.com/dcm
You will see that content published with FlaExporter automatically passes all of DoubleClick’s checks without any additional work.
?
Go here to learn more about working with FlaExporter--
http://www.fla-exporter.com/learn
Follow us on Twitter
Fla Exporter © 2016